Thursday 13 September 2012

My Pallet Shed

nodp

Today I've something not related to painting for a change...

A few months back, I came across this website  of various people making entire sheds out of pallets and reclaimed/recycled wood. I liked the idea so much and since I'd already been making various bits and pieces with pallets and worked on some bigger project (including a roof) in my own house. I decided to give it a go.
Here's the project so far...

First was the job to clear a whole area. I had this spot at the back of my garden that used to be a 7ft mound of rubble. I had spend a whole winter clearing it, saving every stone to build the walls and ground and every wheelbarrow of soil to even out places in the garden. I had time and I wasn't going to kill myself doing it so it took me about 4 months, shifting only just 10 wheelbarrows everyday.


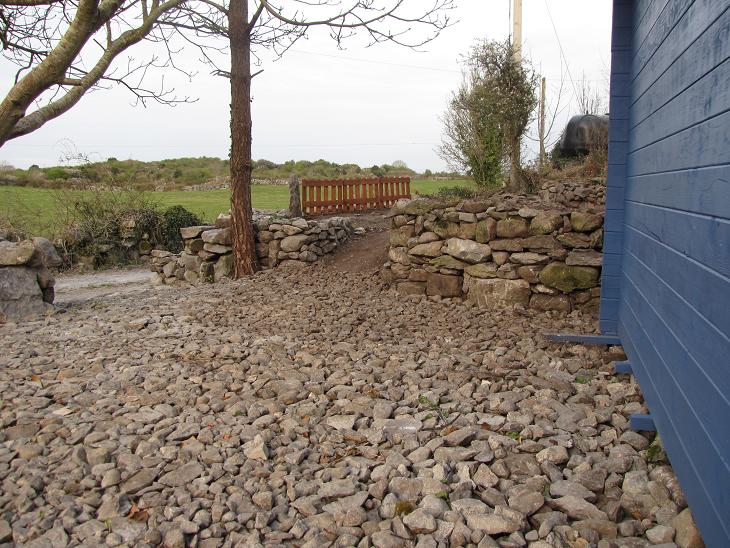
I initially thought about doing a wee garden patch there with raised beds but there just wasn't enough light coming it as between the trees and the existing shed. So I decided to use the space to build my pallet shed.
First step was to find a source of pallets of course. Best is to find a couple of small offices or supplies shops that don't bother recycling pallets. Industrial estates often leave pallets outside their warehouse as well for people to take. just drive around one Saturday and ask. You'll need a LOT of pallets.

Then flattening the area and making an even bedrock. The whole place is already full of massive rocks barely filled by soil so it's already pretty stable. I just put a 6 inch layer of rocks for draining purposes.

The structure is simple. I just nail or screw the pallets to the floor and together. I use sections of pallets too to make cross braces that keep them together.


It takes a good bit of cutting measuring to get everything to fit properly as nothing is really square and in a perfect straight line.
I made the whole structure two pallets high, about 7 and a half foot high. Before I started on the roof i just wanted to get a feel of how the outside was going to look like. A friend suggested I use a damp barrier so i went around a few industrial building sites and asked them if they had a few old tarps in their skips. After a few enquiries I had enough sections to cover the entire county,
I started dismantling pallets and put them straight flat on the walls (first photo) until a friend pointed out that water wouldn't run down the wall, but instead collect and rot the wood so I took it all appart and did a proper cladding by overlapping the planks (second photo) -it seems obvious now!
This will use up a lot more wood of course but it's the only way to do it properly.


Next job was the roof structure.I hadn't done this before so I looked up online. There are tons of youtube videos on how to best do a roof. I had some leftover 2x3s and got a reclaimed bit of 6x2 leftover from a building site. perfect!
I did the roof in one afternoon but you will need help lifting and  setting up the central beam (my wife gave me a hand... it's a 5 min job). Take your time. Think about what you're doing and what the purpose of each section of wood is. Next think I knew, I had a structure solid enough to dance on it.

I then used planks from dismantled pallets to do the roof cover. You don't need to overlap them there and they don't need to be completely tight as I'll put a tarp on top and some sheets of roof tar covers afterwards.

Once the roof was done I covered it with some sections of old tarps I had recovered from building sites. Make sure you overlap them from the bottom up.
Once this was done, I added a second over of tar roof felt. I had 2 rolls of it already but they weren't enough so I had to buy an extra one. There about 25 euros each.

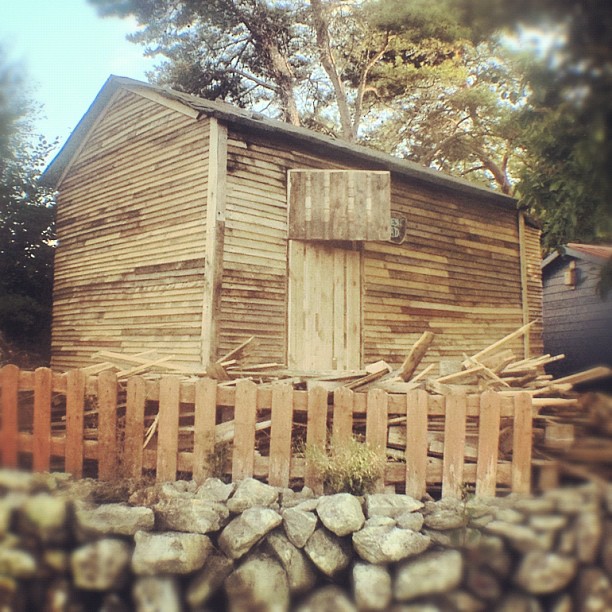
Then, with the roof secure I can now start the slow process of cladding the entire shed using yet more dismantled pallet. It's a slow and tough process, especially the dismantling part, and quite a workout so you won't need to get into the gym for a while. This will take a LOT of pallets. The from wall on the picture bellow took about 18 to 20 pallets alone.


I also line the inside of the shed, using the thicker planks on the bottom of the shed and some relaimed sections of ply for the wall -again, I got the ply from a site, they were using it to mask the work site. once sanded and trimmed it's perfect. It'll be painted also later so it doesn't have to be perfect right now.


...
...
After a few months of work, I'm glad to say that I'm nearing completion. The shed will be my surfboard shaping bay and is made from pallets and reclaimed wood and bits. Total cost is under €170 , for screws, roof felt a few electrical fittings etc...
It just needs a door (in progress), some wood protection on the outside and a clearer blue inside and a couple more pieces here and there but it's fully functional now, dry and water tight.


Saturday 1 September 2012

Repurposing my water trough

 
I'm a hoarder. I like to collect things people don't use anymore and give them a new life.
I'm a firm believer that re-use is the way to helping the environment.
All these new eco products are great but have one major downside : They're all new manufactured products. How can you help the environment by taking more resources and making yet new stuff.
Reuse instead.

Anyway, when I moved to my new house, I new there was something nice to be done with the old water collectors.

I started with cleaning up the area. I wasn't sure what I was going to do with it yet, I just knew I had to do something. The "only" challenge was I had no experience whatsoever in building projects ...


Once it was all cleared of vegetation, I emptied the tank and started making an opening in the 1ft thick wall... turns out, I spent a fortune on plasters and band aids.


In the meantim, spring arrived and we decided to paint the sad looking walls of our little cottage house. Everything looks better with a bit o' paint.


Next, I finished the opening (about 1m wide) and finished the paths around the house. These are very important for any house as they help dry the walls and help prevent dampness inside. Also it's much easier to walk around the house when it's wet.


I left this project at that for a few months, trying to decide what to do next. I also sorted the paperwork. luckily, the structure was exempt from planning permission.

When friends approached me and told me they were getting rid of their hot tub, I instantly knew this was the right place for it. And it kept witht he theme of water ... water collector - hot tub ... right ? right ? get it ?
Anyway, it made sense in my head. I'll spare you the dismantling part (it came in a wooden shed type of structure ... and yes, I kept all the wood) and transport but we eventually got it on our grounds.
The opening was just wide enough to allow to slide the thing in on it's side.


I had to get some of the pipes fixed for leaks and a friend of mine looked after the electrics. Luckily again, most of the electrical components were in working order, bar the heating element. I was fried and beyond fixing. A quick look on ebay, and I had the element in my letter box.

I used some of the wood I had to secure and level the tub itself and used the old windows from the old shed structure to make new ones ; double glazed !

I was time to start on the building part.


Once I raised the walls high enough and plastered them, it was time to put the roof down. I had been gathering 2x4 here and there in the meantime (skip, building sites, friends ... ) so i only had to get and extra 4 or 5 to make the whole roof structure.


I got some shed roofing sheets from a local company. There's a 8x12 patch of transparent sheeting. It lets plenty of light in during the day and makes heats up the place naturaly. The downside is that once the sun is down, heat loss occur quickly as there's no roof insulation. However by then you're either in the tub, or it's covered with the insulated sheets of foam.

I realised too late that I should've finished the external plaster first as well as the leveling of the door walls. It's not too difficult to do at this stage but was a bit more cumbersome than it needed to be.


And that's the structural building done (just needs a bit o' paint...) . It's not a pro finish I know, but it's my first building project and I'm pretty proud of it.

Next comes tilling, sawing, hammering, cladding, cursing...
I had been collecting old wood, tiles, bags of cement etc... over the years so I had everything handy.

I made an old door using the wood from the old shed. A bit of advice, when you put it down, make sure you can still open it from the inside...


The tub is now working and the room is fully tiled. I will also do a big mural painting of a wave on the back wall (where the picture is taken) to look at when you're in the tub.

I got some blocks of kingspan insulation foam from a local building site ( I asked the guys working there if they had any leftovers and i ended up with 4 full sheets) and fully insulated the roof.

I then made a small unit with wood leftovers and broken tiles. handy to store the towels and a few fresh cans ... and a little home made mural painting.